AppzCart Clinic · Manual UI testing
How a patient moves through the clinic
Each role passes the patient on with one button. The next role sees the patient in their list within a few seconds, and their bell (🔔) shows a notification. Nobody has to phone or refresh. The screenshots below are from an end-to-end run of exactly these steps.
- Reception: register · book · Check In · Send to Nurse
- Nurse: vitals · triage · Send to Doctor or Escalate to DMO
- DMO (if escalated): Confirm Disposition
- Doctor: consult · lab · Complete Visit
1. Reception: register, check in, send to the nurse
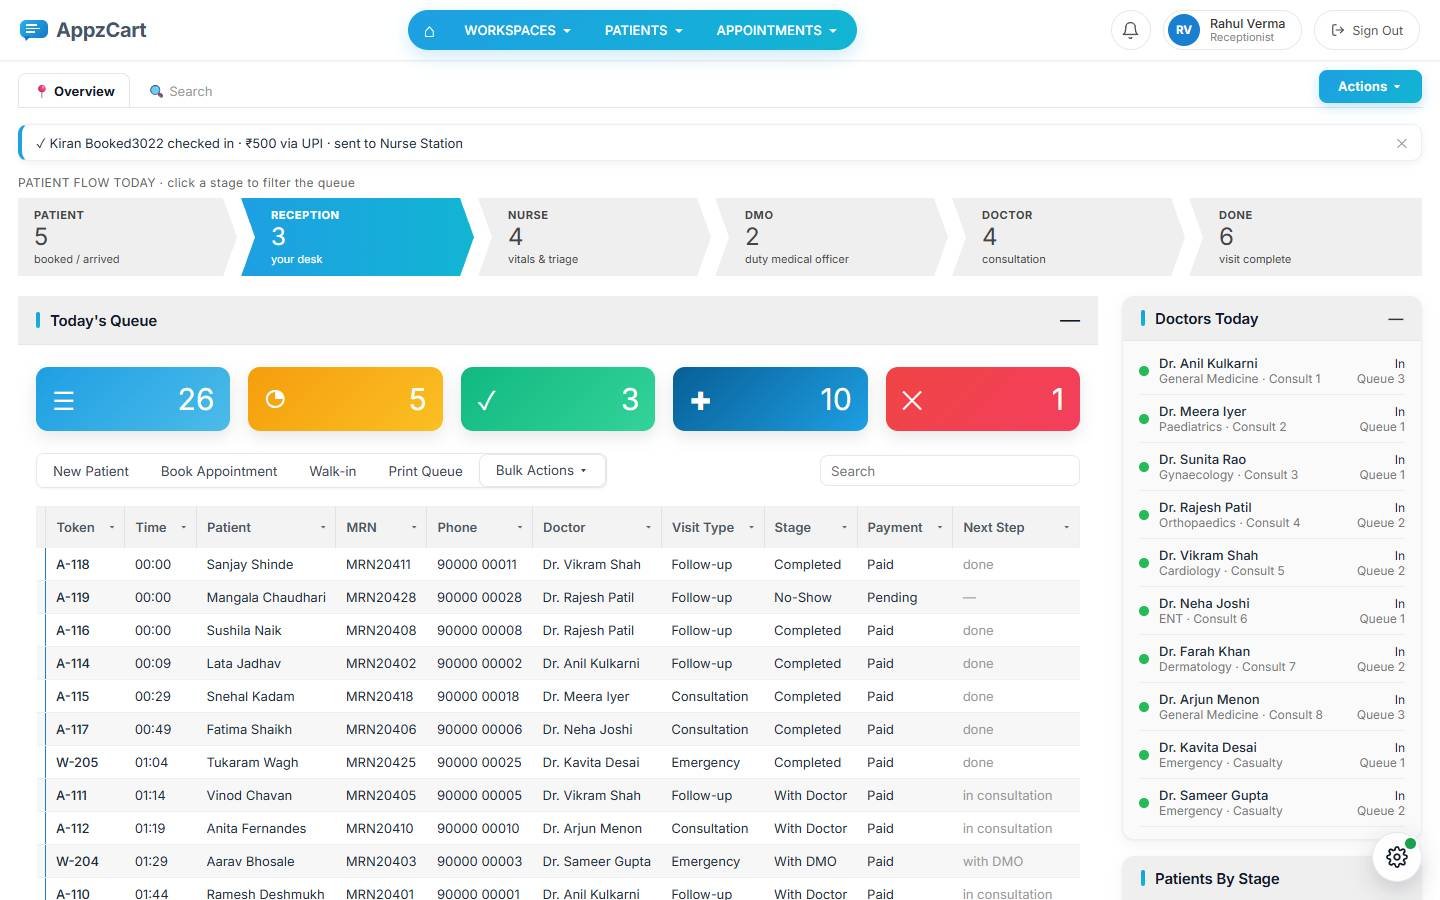
rahul.vermaFront Desk opens on Overview with Today's Queue.
- New patient: New Patient → fill the starred fields (First and Last Name, Sex, Date of Birth, Mobile, Emergency Contact, Reason for Visit, Privacy Notice, Data Consent) → Save & Book Appointment.
- The booking opens with the patient chosen. Pick a free slot (or Actions › Pick Next Available Slot) → Confirm & Check In (for today). For a later day, use Confirm Booking, then Check In from the queue's row menu when the patient arrives.
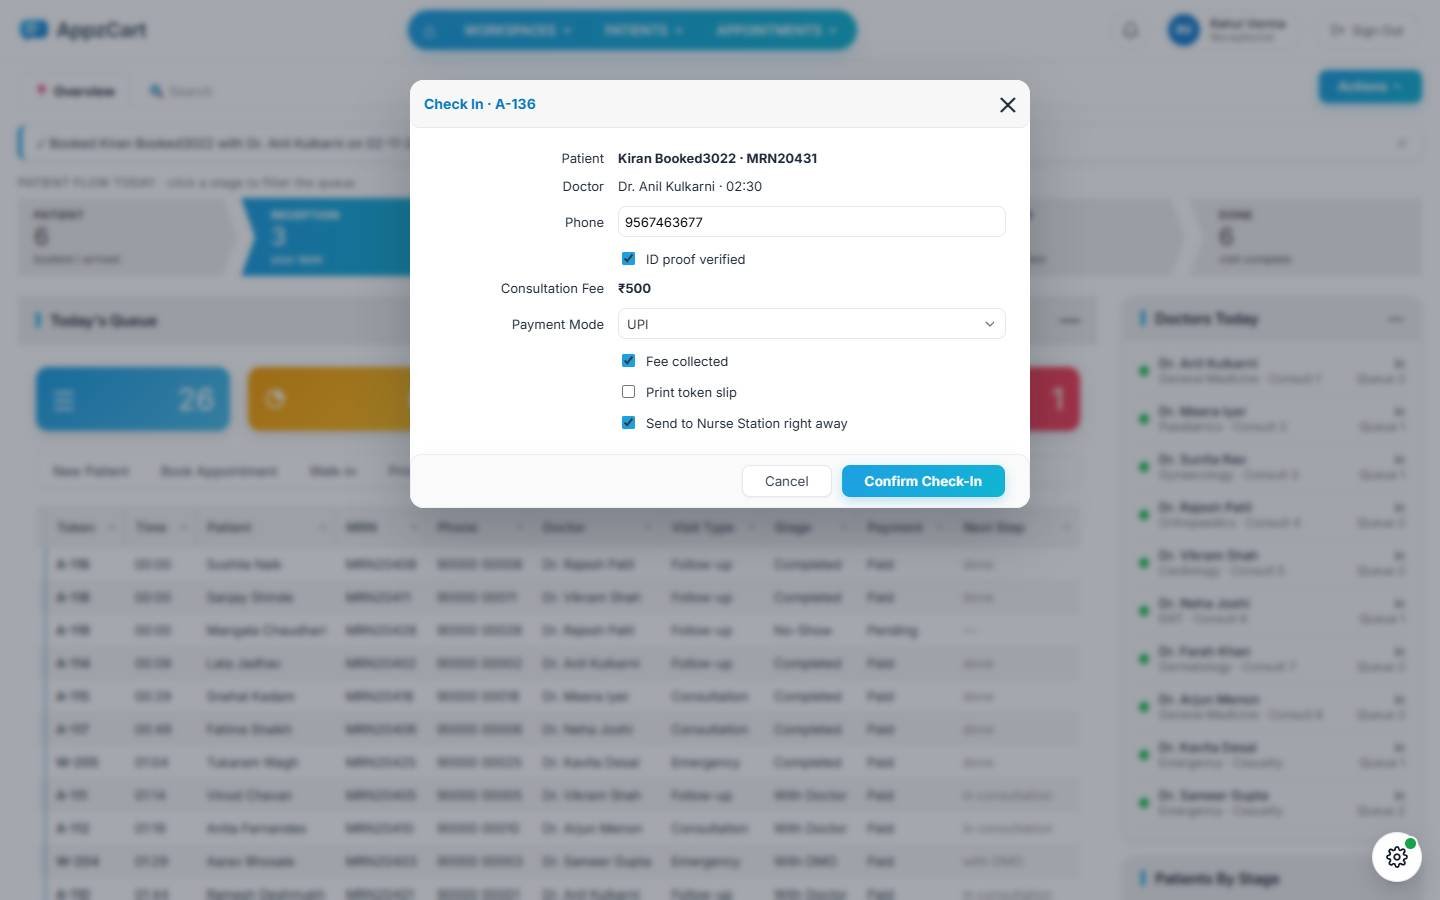
- In the Check In dialog: tick Fee collected, keep Send to Nurse Station right away ticked → Confirm Check-In. The row now says With Nurse · at Nurse Station.
- Walk-in: Walk-in → fill the form → Save & Send to Nurse. That's all.
2. Nurse: vitals, triage, hand on
priya.nairThe patient appears in the Triage Queue as Waiting.
- Click the patient's name (or Start Triage at the end of the row, or Actions › Start Next Patient).
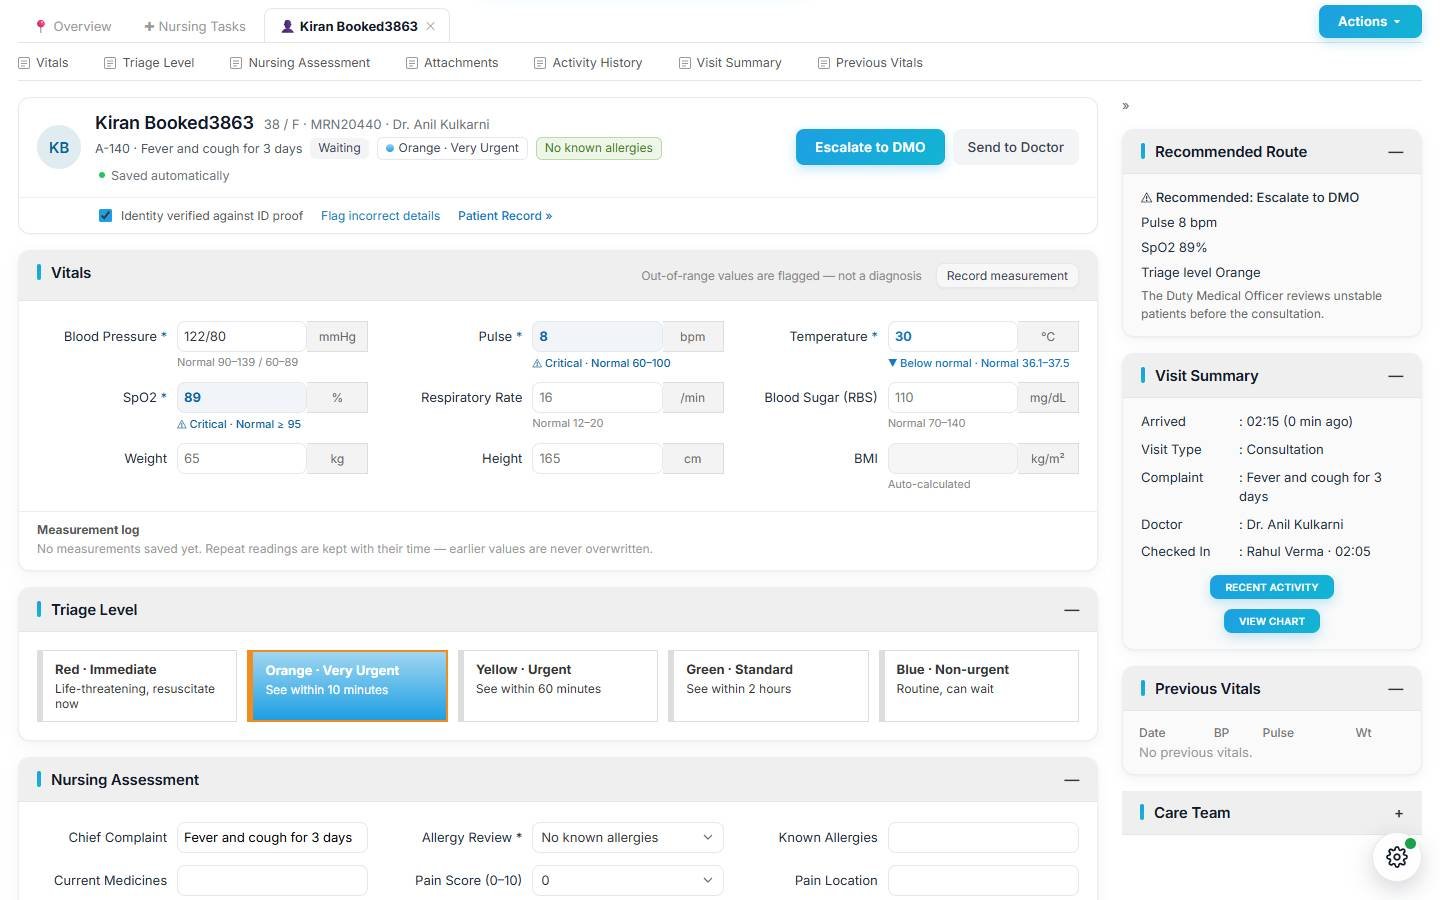
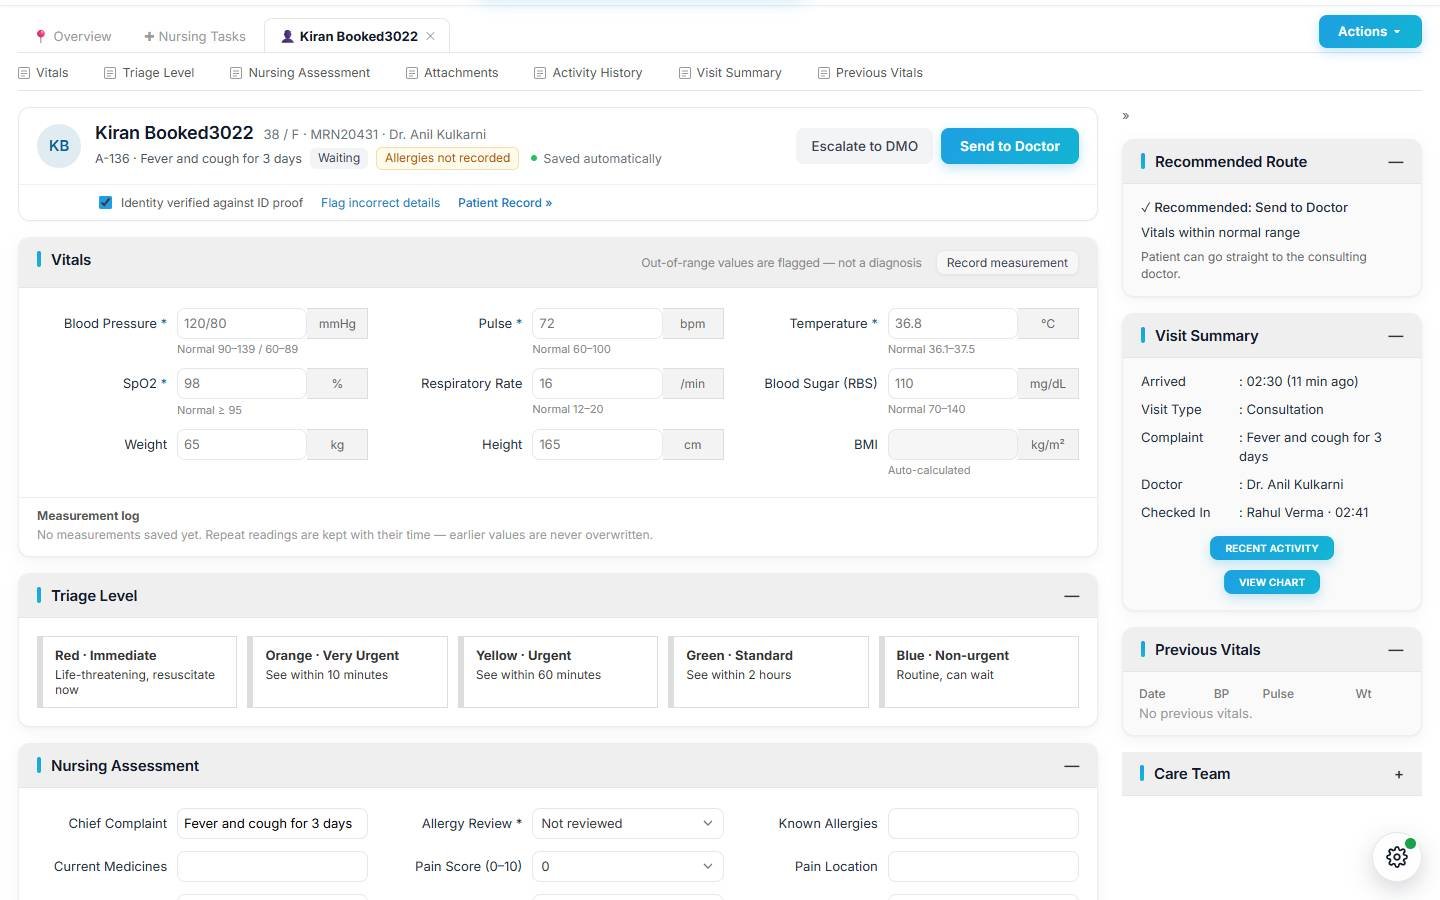
- Enter Blood Pressure (as 120/80), Pulse, Temperature (°C), SpO2. Choose a Triage Level.
- Tick Identity verified against ID proof and set Allergy Review.
- Press Send to Doctor, or Escalate to DMO for an unstable patient. The box on the right recommends one. If you set Escalation to Yes, Action & Clinician must be filled.
If something is missing, the message names it and the screen jumps to it. Everything saves as you type.
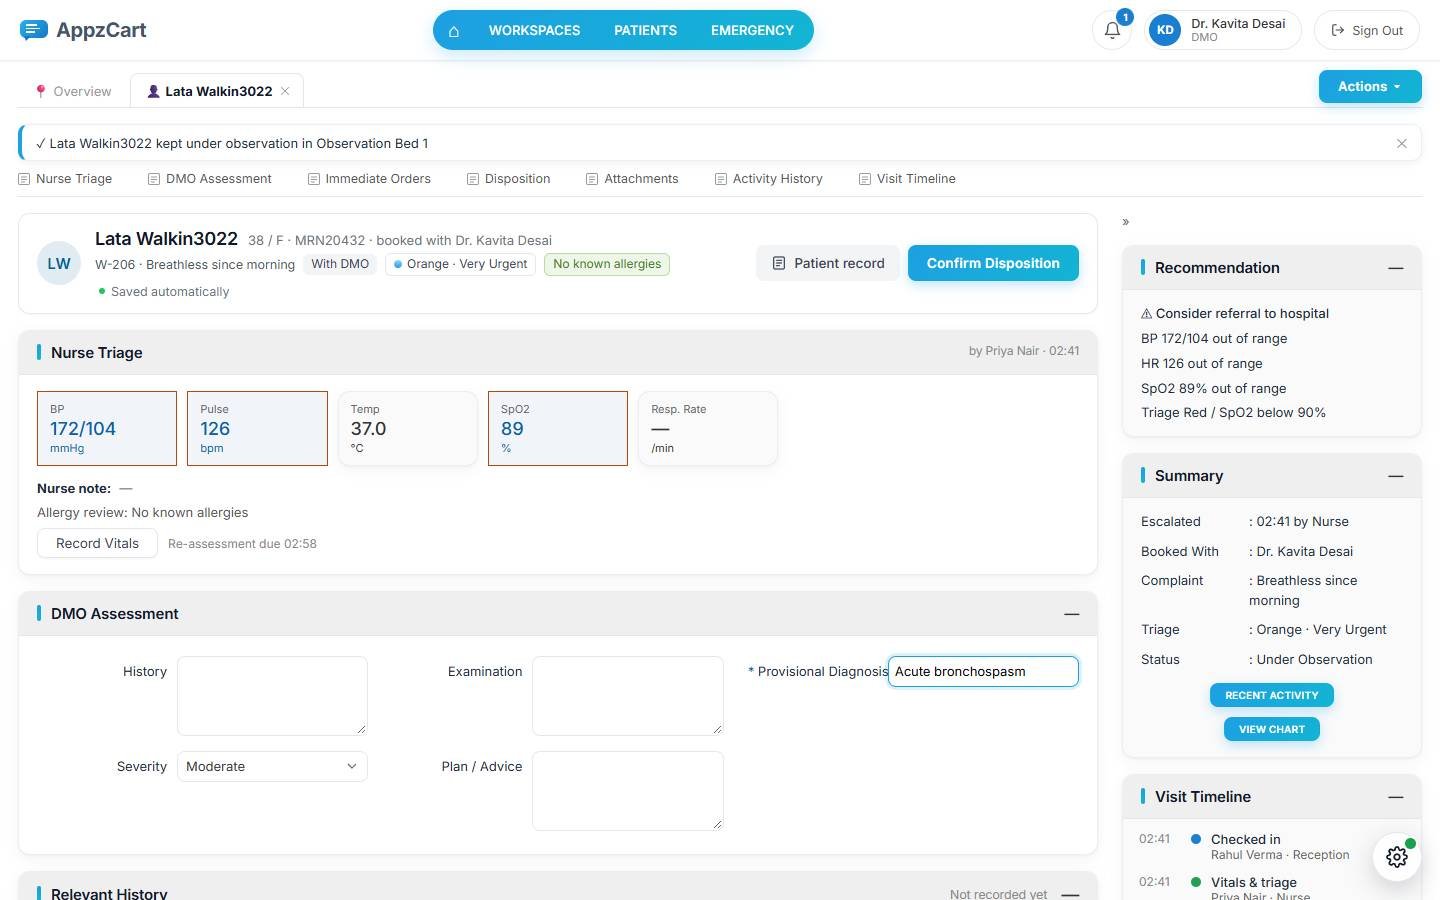
3. DMO: review and decide
kavita.desaiAn escalated patient appears on the DMO Console as Waiting, with the nurse's vitals.
- Press Review on the row. Enter the Provisional Diagnosis; add Immediate Orders if needed.
- Under Disposition pick one: Send to Doctor · Keep Under Observation (choose a bed) · Refer to Hospital (choose the hospital) · Treat & Discharge (write the discharge advice).
- Press Confirm Disposition. Under observation, the nurse gets a monitoring task; later press Send to Doctor and Confirm again.
4. Doctor: consult, order tests, complete
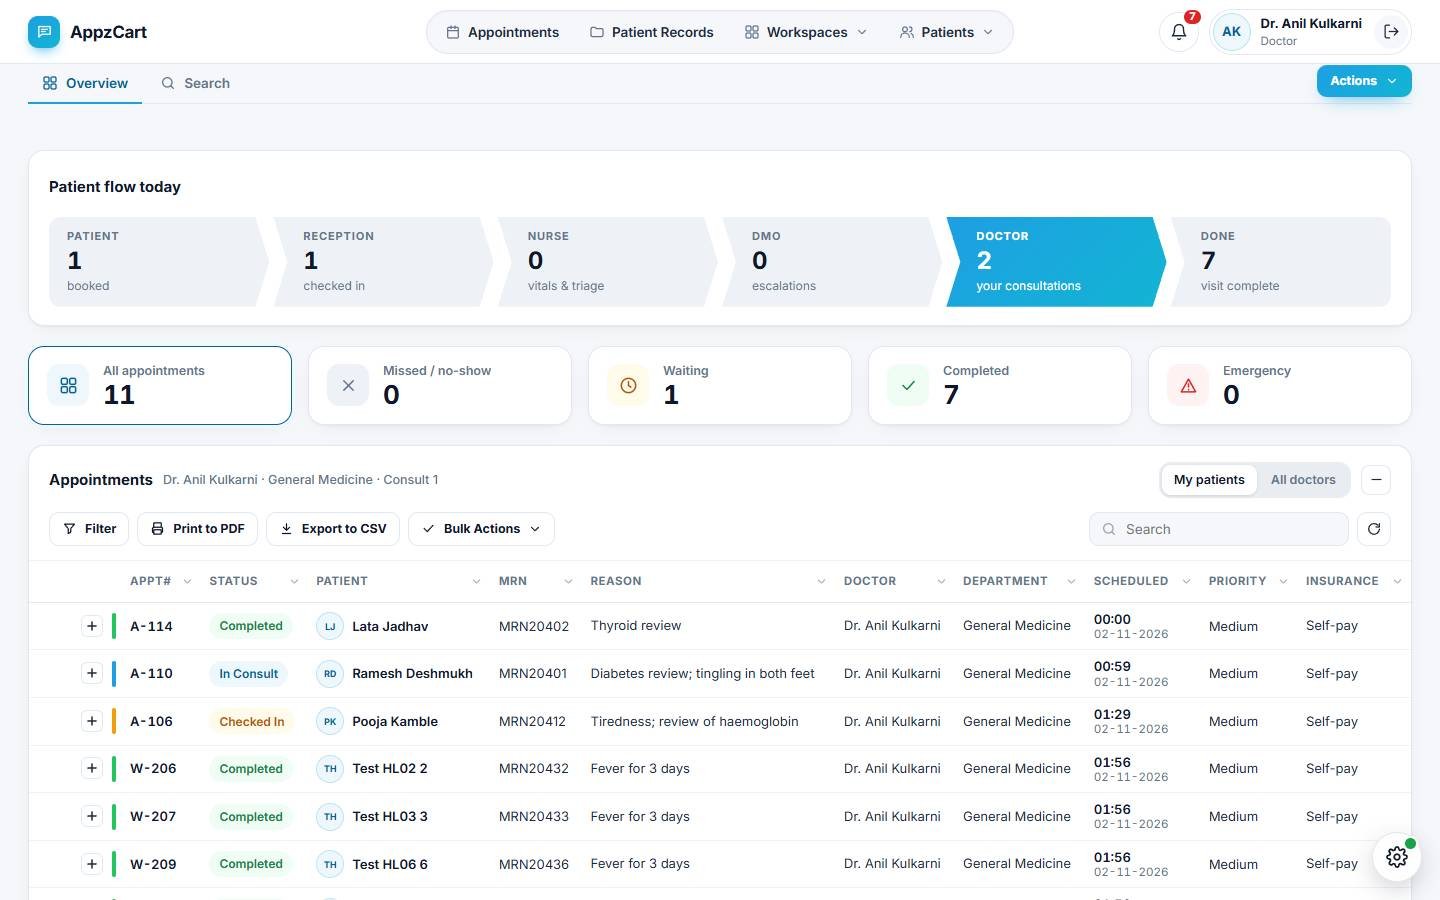
anil.kulkarniThe patient appears in Appointments (My patients) with the nurse's vitals.
- Click the patient's name or Appt# to open the consultation. (The ⋯ menu › Edit Appointment In New Tab does the same.)
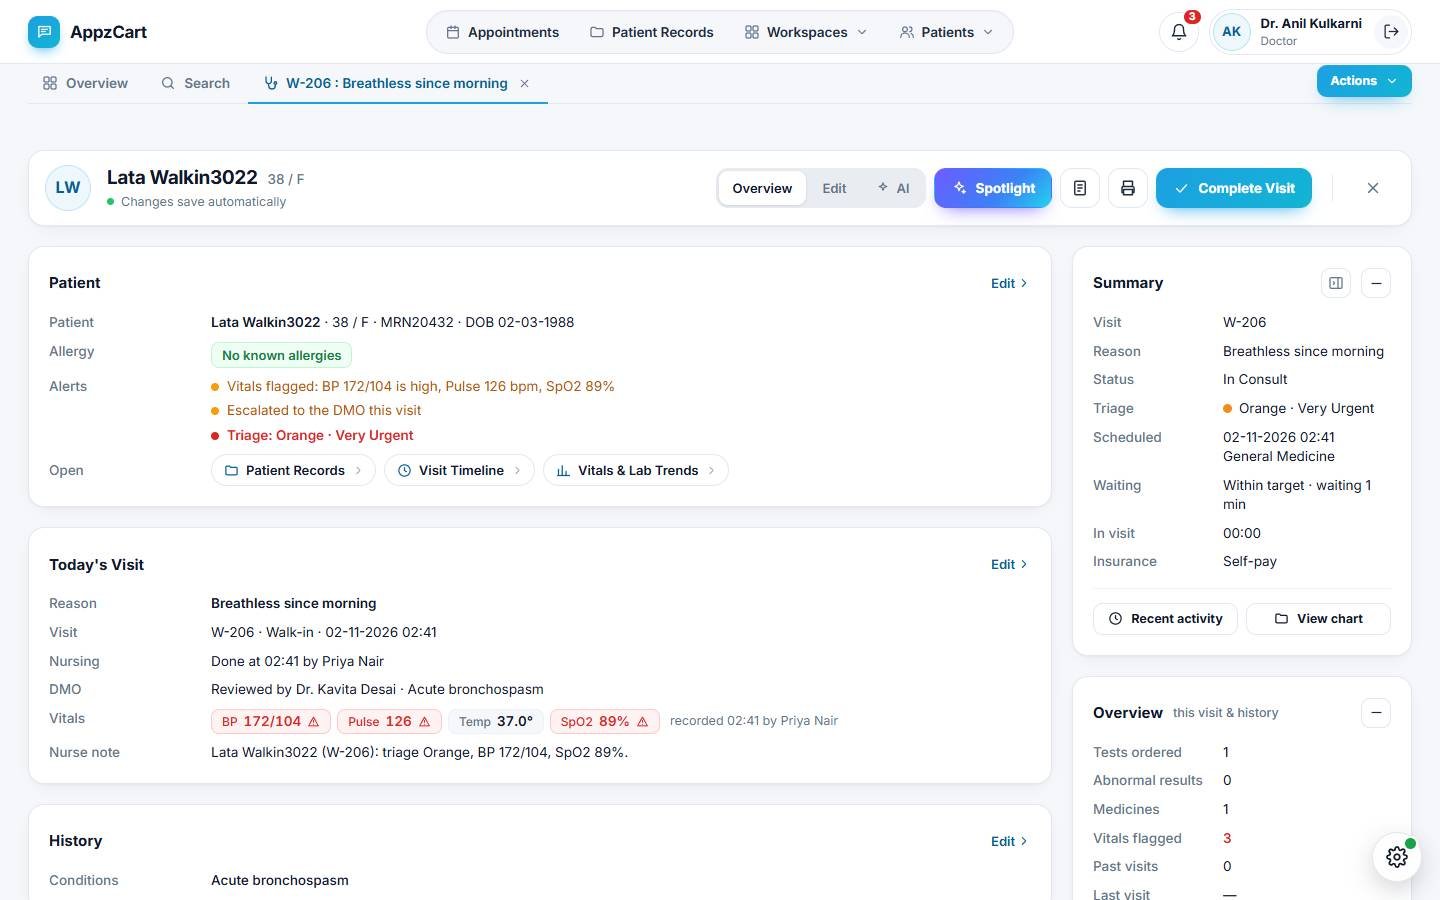
- Start consultation → Diagnosis, Advice to Patient, a Medicine with Dose and Duration → Add.
- Tests: Order test (e.g. CBC) → Send to Lab.
- When the result comes back (bell), it shows on the consultation. Press Complete Visit. Reception sees Completed.
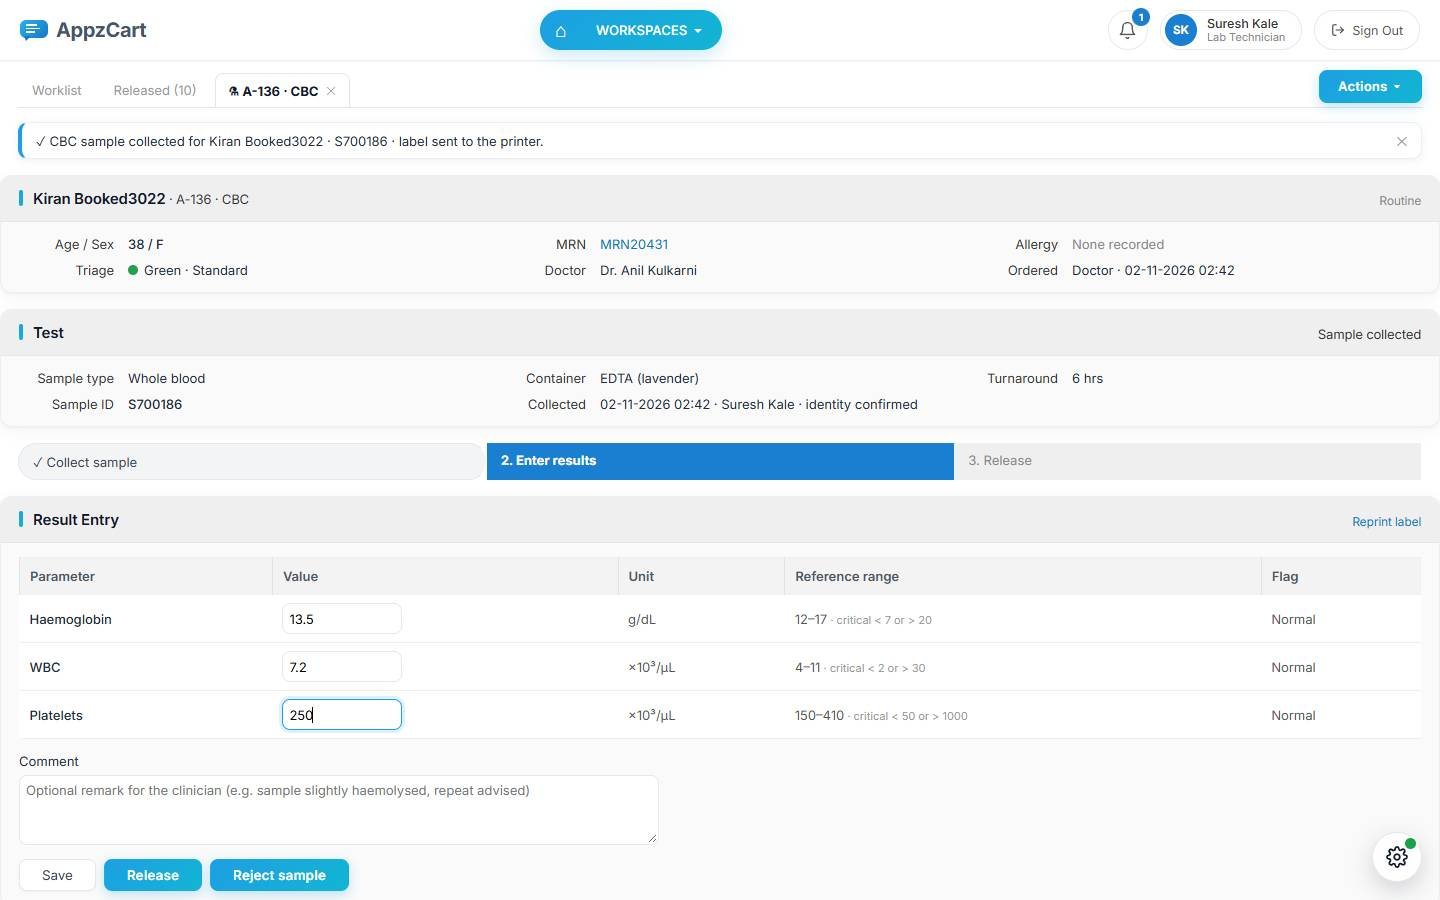
5. Lab: collect, enter, release
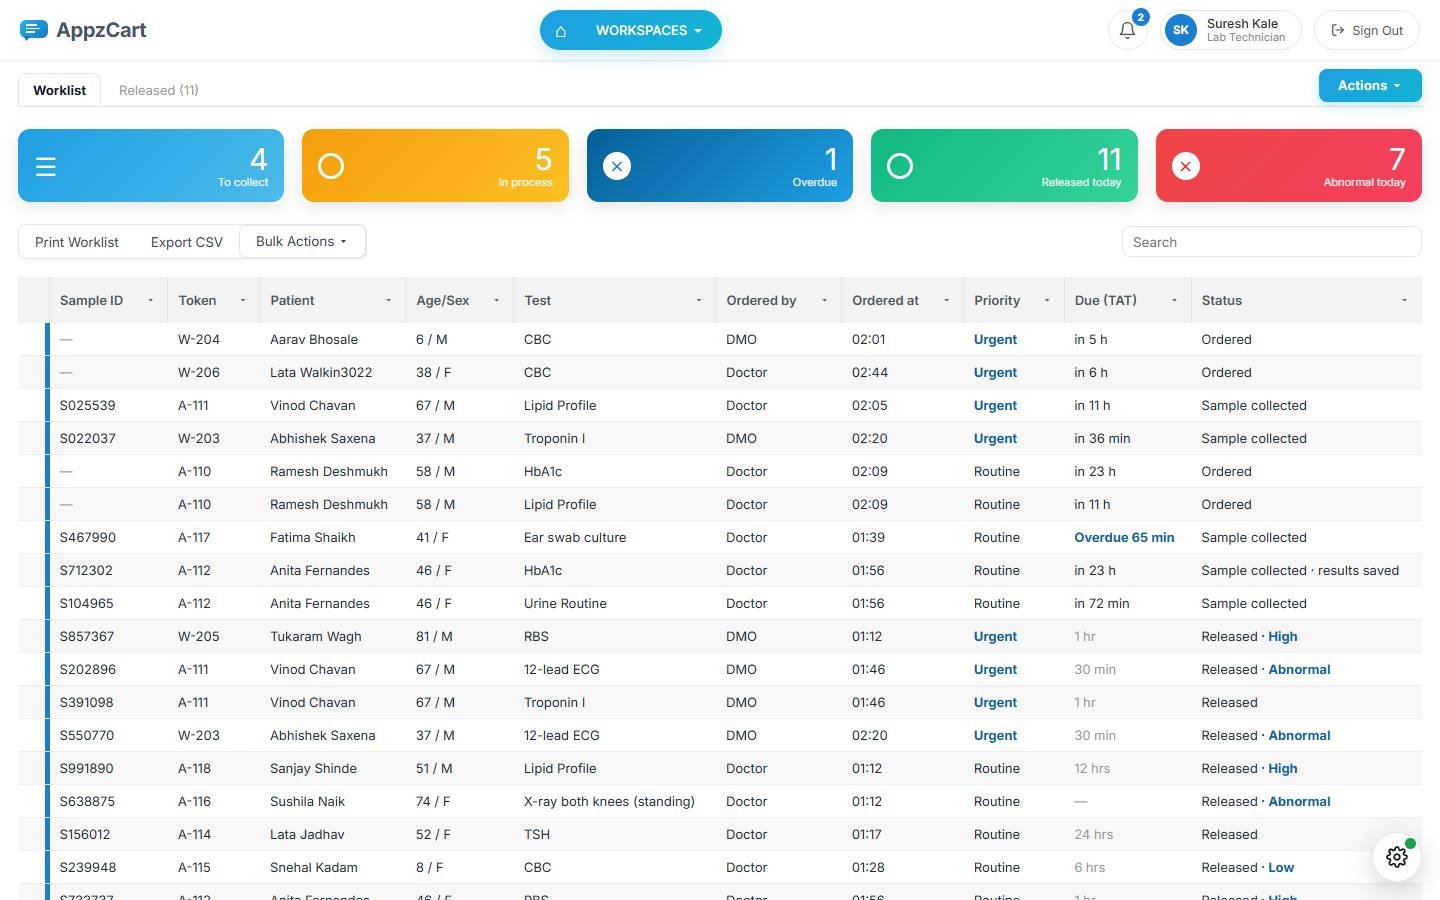
suresh.kaleThe test appears on the Worklist.
- Open the order (click its token) → Collect Sample → Identity check: Confirmed: name and MRN match the request → Collect & Print Label.
- Enter each value; the flag (Normal / High / Low / Critical) fills itself → Release. The doctor is notified.
- A critical value asks you to phone the clinician and record the read-back first.
Checked before the team testOn 02-11-2026 every step on this page was run in a real browser against the
clinic API and database. That covered booked and walk-in patients, nurse to doctor and nurse to DMO, DMO observation and
discharge, the lab, and Complete Visit, and each hand-off was confirmed on the next role's screen and on the server.